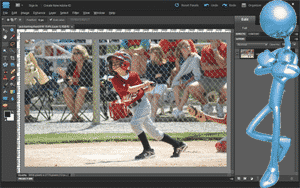
When I was a kid, photography fascinated me. And although I grew up in a small farming town of only 600, I was lucky because the local high school science teacher was into photography and willing to teach me all he knew about working in a darkroom.

Still, it was a lot of fun.
But now we jump to the present. No longer do I have to work with smelly chemicals, or even spend hours agonizing on ONE picture. Instead, I now spend my “photo development” time in a DIGITAL darkroom, right there on my computer, and my pictures TURN OUT GREAT…. just like my minds-eye sees them. And it doesn’t take me hours to make them look great, it takes me only MINUTES.
And what’s even cooler, is that ANYONE can do it... with a little push in the right direction.
So here’s the deal… At our computer lab, the AgeWell Computer Education Center in Lincoln, NE, we offer two classes that take you from the basics of how to work with your photos, all the way through the fun of restoring and fixing your most important photos.
In the first class, called Digital Imaging Basics – Featuring Photoshop Elements, we take you through the essentials you’ll need to do “quick fixes” of your photos. Some of what you’ll learn in this 3-part class includes:
- All the basic terms and jargon you’ll need when working with pictures and talking with others about it. (Your friends will be amazed!!!)
- How to scan in all those old prints, slides, and negatives you have sitting in a shoebox under the bed.
- A quick review of the best place on your computer to keep your pictures, and how to get them there.
- The quick (less than 5 minutes), basic steps to take that make your pictures look their best before you print them or send them out on the Internet
And besides a great handout-outline of what we’ll do, we also have a Digital Imaging Basics book available for purchase on our web site, but also available for purchase (at a discount) at class time. In fact, we let you review the book for 2 weeks before you even have to decide if you want to keep it.
And for a preview of what the class is like, you can CLICK HERE to watch a tutorial video we put together on how to do some basic photo fixes.

Some of the things we cover in this 5-part class include:
- How to crop and size your picture to make it perfect for printing or email
- How to take a photo that’s too dark or too light and make the exposure almost perfect!
- How to color correct those pictures that are little too blue, or green, or red… etc.
- How to remove imperfections (dust, blemishes, cracks, creases, people we no longer like, etc.)
- How to tone down a busy background so that the subject almost pops out of the picture.
- How to create a vignette effect.
- How to take the best parts of two pictures and pull them together into one.
- How to create a photo collage
- and lots more…
And just as we have a great book for the Photoshop Elements Basics class, we also have a More Photoshop Elements book available for purchase (at a discount) at class time. In fact, we let you review the book for 4 weeks before you even have to decide if you want to keep it.
And to give you a better feel of what the More Photoshop Elements class is all about, I’ve put together a video overview that also takes you through what we call “basic photo editing workflow”.
[Click on the Video, below, to watch it]
And as always, if you have any questions or comments, please leave them in the comments area below.


